ProductResourcesPartnershipPricing
PAY
EMPLOYMENT
Employer of Record
Hire full-time talent abroad without setting up a legal entity.
Contractor Payment
Pay freelancers and contractors worldwide with built-in compliance.
Global Payroll
Run payroll for international teams with automated tax and legal support.
Global Mobility
Handle global mobility — manage visas, permits, and relocations seamlessly.
Resources
Blog
Expert insights on global payroll, EOR, and payments.
Global Hiring Guides
Country-specific hiring resources
Salary Calculator
Calculate take-home pay and taxes globally.
Global Holiday Calendar
Country holidays for payroll and compliance planning.
Help Center
Guides and FAQs on Invoing, banking and EOR
Request Demo
Sign in
Sign in
Request Demo
How to Submit an Expense Request in Remoly
Search for answers


Search for answers
How to Submit an Expense Request in Remoly
Submitting an expense request in Remoly is simple. Follow these steps to get reimbursed quickly.
Step 1: Open the Expense Section
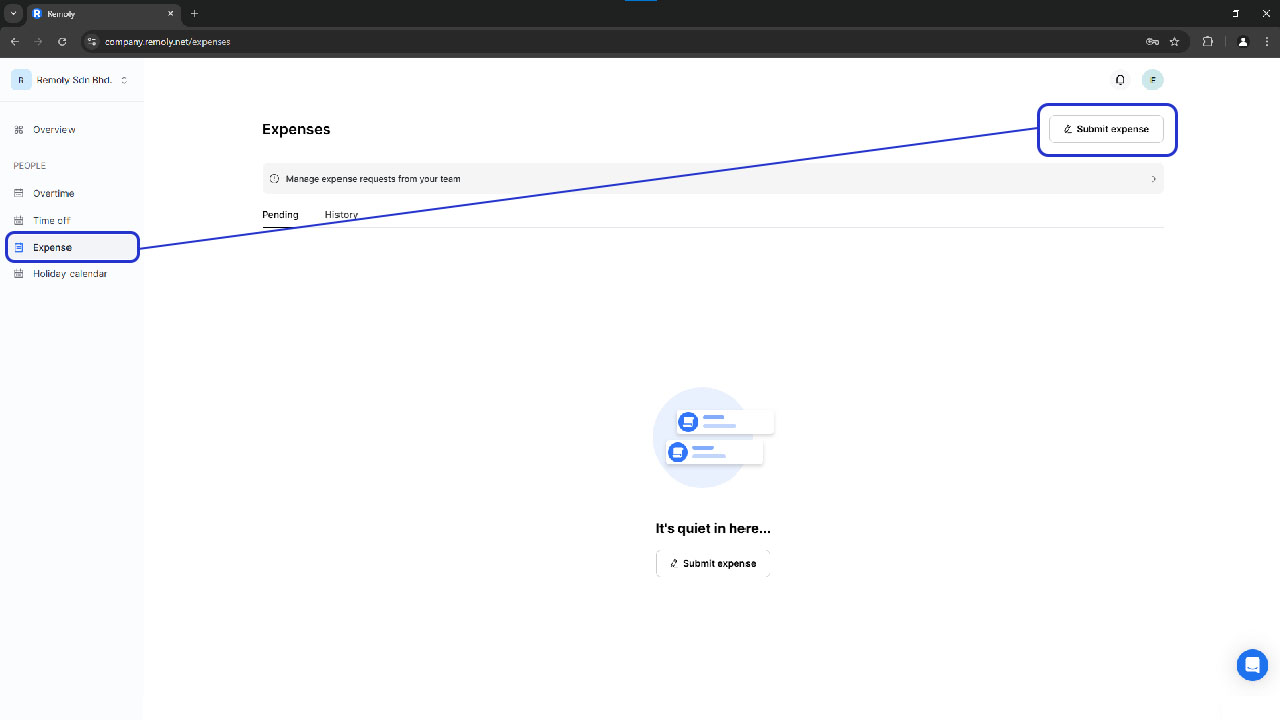
- Log in to your Remoly account.
- Click Expense on the dashboard.
- Select Submit Expense to start.
Step 2: Fill in the Expense Details
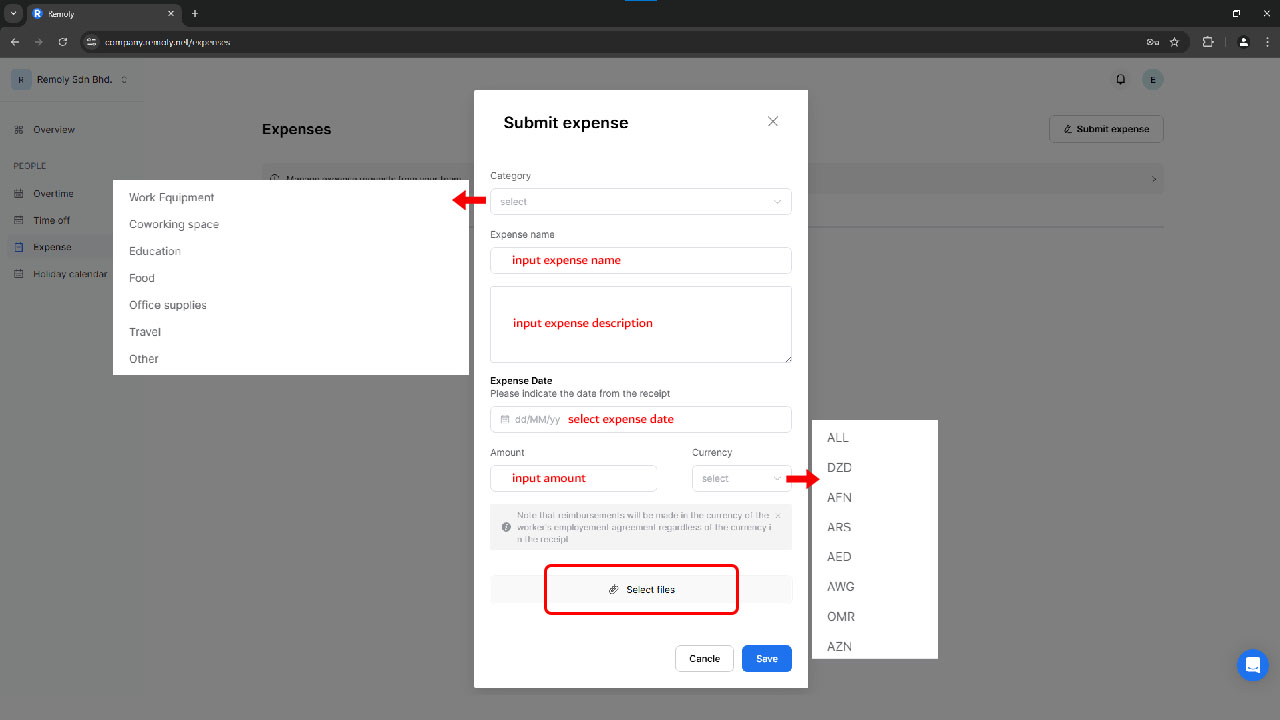
Choose a Category
Pick one of the following options:
- Work Equipment
- Coworking Space
- Education
- Food
- Office Supplies
- Travel
- Other
Enter Expense Name & Description
- Add a short name for the expense.
- Provide a brief description.
Select the Date
- Enter the date of the expense.
Fill in the Amount & Currency
- Type in the amount spent.
- Choose the correct currency.
Upload a Receipt (Recommended)
- Attach proof of the expense for faster approval.
Save & Submit
- Check all details.
- Click Save to send the request.
Step 3: Wait for Approval
- The request will be reviewed by your team.
- Once approved, reimbursement will be processed.
Following these steps ensures a smooth expense request process.
Easy to start, intuitive to use
"I love Remoly, our very own collaboration tool that makes interacting with my team members so easy, effective, and fun. It's intuitive and can do so many things all from one place.❤️“
Employer Branding Manager
Internet, 10,000+ Employees
"Makes Google Workspace look anachronistic."

Google play Review
“It's become a real go-to staple.”
Google play Review
"Holy Smoke, Lark has an insane feature line-up offerings from the get-go."
Google play Review
"I would suggest people try this app, which gives you a feel way beyond other apps in place."
Google play Review
"Once my teammate suggested using Discord instead of Flock or Slack. But we realized Lark is much better among all."
Google play Review
Easy to start,
intuitive to use
"I love Lark, our very own collaboration tool that makes interacting with my team members so easy, effective, and fun. It's intuitive and can do so many things all from one place.❤️"
Employer Branding Manager
Internet, 10,000+ Employees
"Makes Google Workspace look anachronistic."
Google play Review
“It's become a real go-to staple.”
Google play Review
"Holy Smoke, Lark has an insane feature line-up offerings from the get-go."
Google play Review
"I would suggest people try this app, which gives you a feel way beyond other apps in place."
Google play Review
"Once my teammate suggested using Discord instead of Flock or Slack. But we realized Lark is much better among all."
Google play Review

Remoly, bringing it all together
All you need is the Internet and Remoly.
Request Demo
Remoly is not a licensed financial institution or bank and does not directly handle or process payments. All payment transactions are securely managed by our regulated partner, Airwallex.
Funds Protection
In the UK: Provided by Airwallex (UK) Limited, an authorised Electronic Money Institution regulated by the Financial Conduct Authority (FCA) under FRN: 900876. Customer funds are safeguarded in accordance with FCA rules, kept separate from Airwallex's own funds.
In the EU: Provided by Airwallex (Netherlands) B.V., an authorised Electronic Money Institution regulated by De Nederlandsche Bank (DNB) under licence number R179622. Customer funds are safeguarded in accordance with Dutch regulatory requirements, kept separate from Airwallex's own funds.
Learn more about how funds are safeguarded → click here
As Merchant of Record, Remoly acts as a compliant intermediary: We issue VAT-compliant invoices on your behalf and enable seamless, regulation-friendly payouts to freelancers worldwide — without requiring them to register a local business entity.